Wednesday, August 28, 2013

USS Constitution - Arranging the Bow

In this post I will cover the head timbers, water pipes and knighthead eyebolts.

The Head Timbers

It is time to take care of the bow of the ship. Assembling the head timbers and the grating is a challenging task. First, I prepared the head timbers for starboard and port, and the grating (cleaning, painting):


At this point, the instructions are not clear about the order of the assembly. After a lot of checks and rehearsals, I decided to assembly the timbers separately, then to glue them together with the grating on the bow.


Fixing the assembled head timbers on the bow, together with head grating, and keep them in the right position while the glue dries is a delicate task. For this, I needed a lot of accessories.


The warning from the instructions needs to be considered: the grating should be glued below the two rectangular holes in the head timber sides. Those holes will be used later.

Enough with the hard tasks! Some easy steps remaining.

The Knighthead Eyebolts

After the glue dried, I took care of remaining details on the bow. First, the knighthead eyebolts


The Water Pumps


Monday, August 26, 2013

USS Constitution - Assembling the guns on spar deck

In this post I included the work on bow chaser, preparing the eyebolts and cleats, gluing the guns and their rigging, and final assembly of the bow chaser

The Bow Chaser

Assembling the guns on the spar deck is a delicate operation. Although most of the guns were already prepared, as described here, I needed to take care of the bow chaser.

There are several small parts to be used: the left and right sides, front and rear wheels, and the barrel (which was prepared before):


Putting them together


... then realising that I forgot to paint the pieces, which made me to take some painful detailed painting of the sides, and, once the paint dried, added two eyebolts


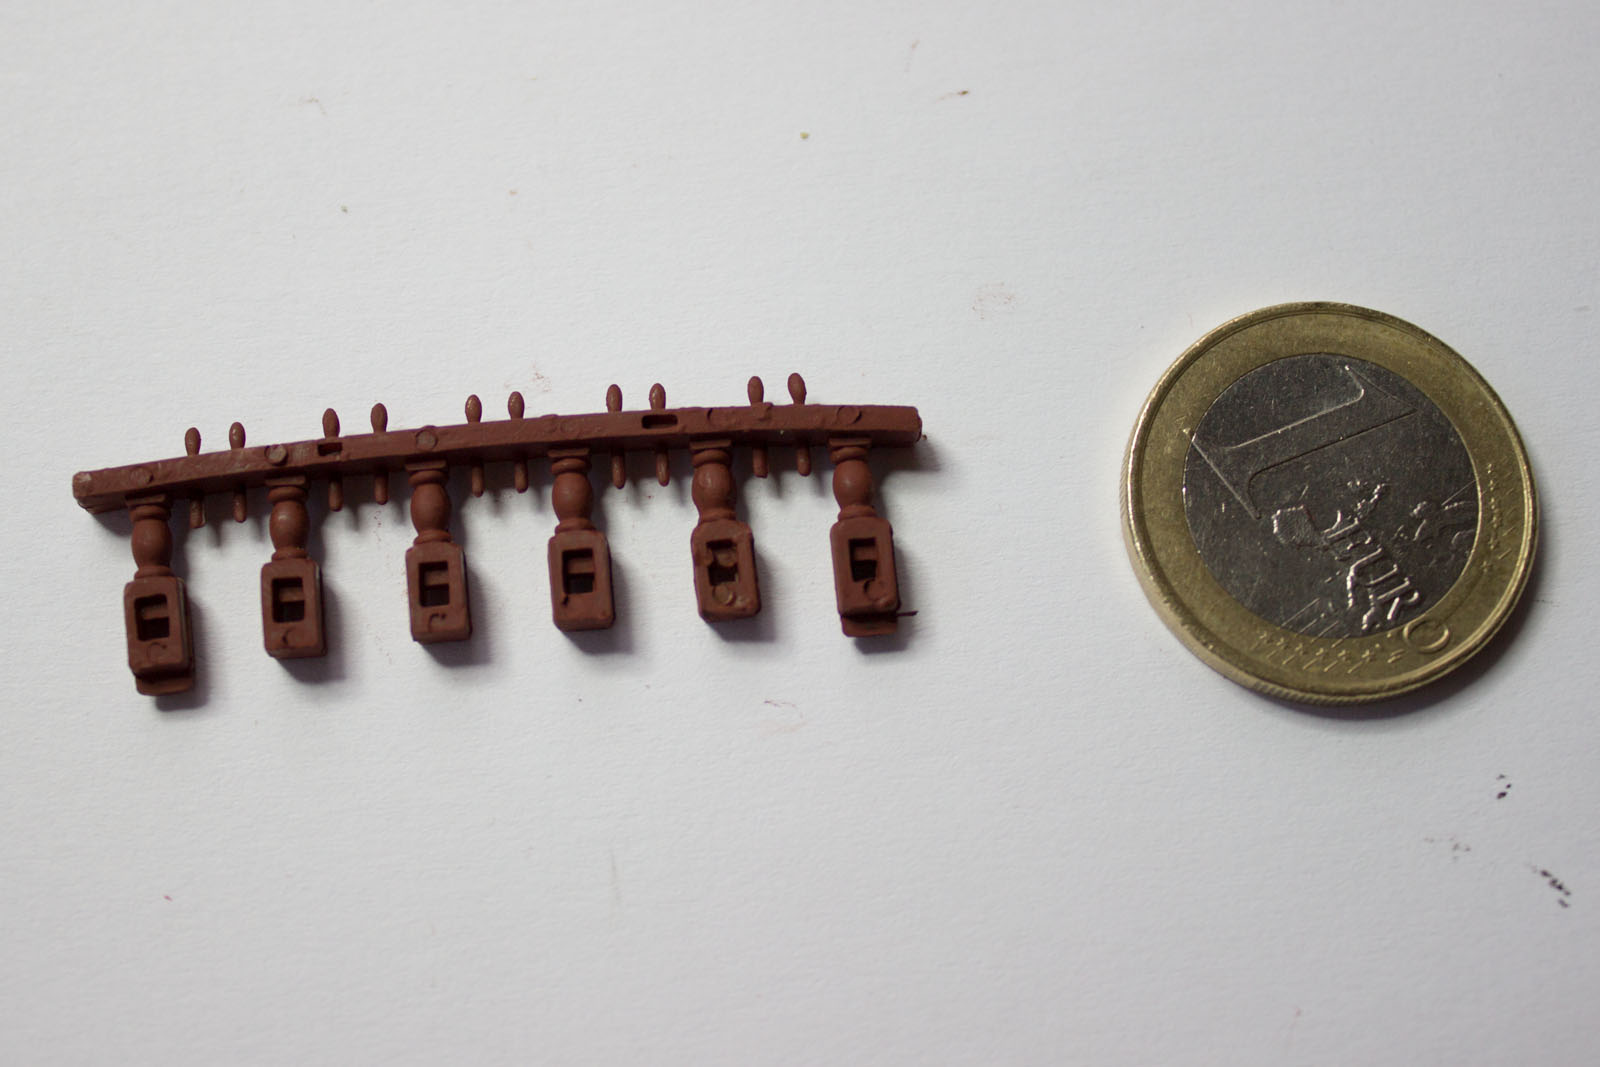
The Eyebolts and Cleats

Having all the guns prepared, I payed attention to the deck. First, I glued eyebolts on each side of the places where the guns will be positioned. They are very small (therefore easy to loose)


... and will be used later for rigging the guns.

One of the mistakes I previously made, while painting the hull, hit me at this point. A lot of small holes were filled with paint, and I had to clean them up while the hull was assembled and deck was in place, which made the task much harder


Having the holes cleaned, I started to glue the eyeholes, and make sure they have the same orientation


Since I had enough space before the guns were in place, I glued the cleats


... and the fore pinrails


The Guns on Deck

Next step focused on the guns. There are 16 guns for the stern half of the deck, and 12 guns of a different model for the bow part of the deck:


I applied a drop of glue on the wheels, and, in the case of stern guns, on the pin on the hull where they should be secured.


Rigging the Guns

And here the fun begun. For each of the 38 guns, I need to do the rigging. Basically, knot a thread through side holes and the end of each gun barrel. For this, I made a two step approach: knot one side and the gun end, glue the knots, and wait to dry:


Sometimes, I needed to put some weight, to keep the knot from the gun rear to unfold.


This way, I made sure that the knot on the back of the barrel will not untie. The second step was to make the knot to the other eyehole, and glue it


Final touch, cut the thread remains from the knots. I recommend to use a really sharp blade (I used a surgery blade for this).


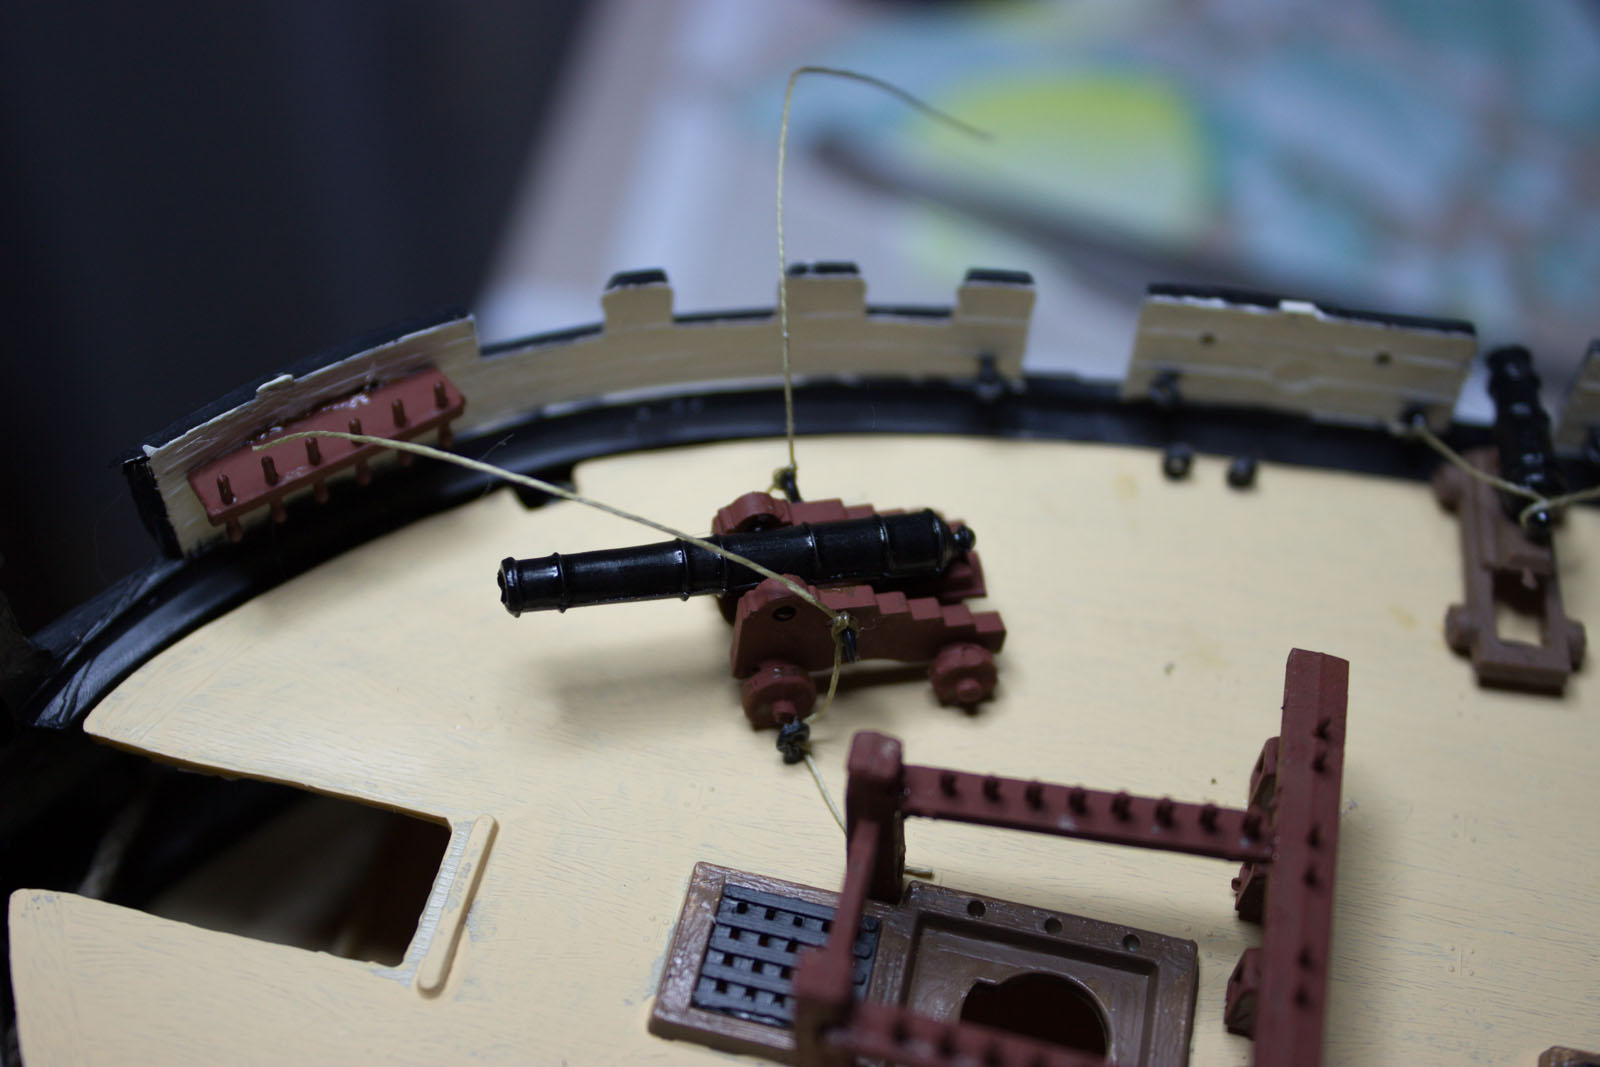
The Bow Chaser in Its Final Place

Having the deck eyebolts fixed...


... I glued the assembled bow chaser on its location, and rigged it on the deck using a similar approach:


So finally, the deck with all the guns rigged in place:


Tuesday, August 20, 2013

USS Constitution - Spar Deck Details (Part II)

Most of the next details on spar deck were easy to solve - take the pieces, clean them, paint them and then glue them on the deck. Some of them, like fiferails, were a nightmare during cleanup, due to a lot of leftovers from casting. Even though the steps on each detail were presented in a linear manner, I actually spent time while waiting for other phases to complete (paint or glue drying) to prepare the pieces for assembling on the deck.

This post continues the previous one with the covers the binnacles, monkey rail, fiferail, the ladders to gun deck, life boat cradles, some fore rails and galley funnel and the grills.

The binnacles

I started with the easiest: the binnacles


... painted ...


... glued in place...


The Monkey Rail

The monkey rail is the the piece on the left side from the picture below


... to be put in its place on the deck:


The Main Fiferail 

This piece required a lot of work on deburring...


... painted ...


... and glued ...


The Ladders to the Gun Deck

They, too required a lot of deburring


... and then glued on the deck. I had to pay attention to the positioning, the ends of the ladders are different, one end is designed to fit in the pair of corresponding holes on the gun deck, and the other to be slightly forced into place, on the margin of the spar deck.

The three ladders in place:


The Life Boat Cradles


Other Fore Fiferails

I continued then with the other kind of "...-rails": fore fiferail


... starboard and port fiferails


... and fore crossrail


... assembled together on the deck:


The Galley Funnel


... and gluing...


... then painting ...


... and finally, assembling in its place on the deck.


The Grills


... the spar deck looks more interesting